Broken Springs
Before I take any trip in the Wildcat I always take it for a drag, usually to work, on the day before I leave for the trip. The purpose is to give the Wildcat a quick checkout. Are the brakes working, wheel bearings ok, tires running ok, all the lights are working, etc?
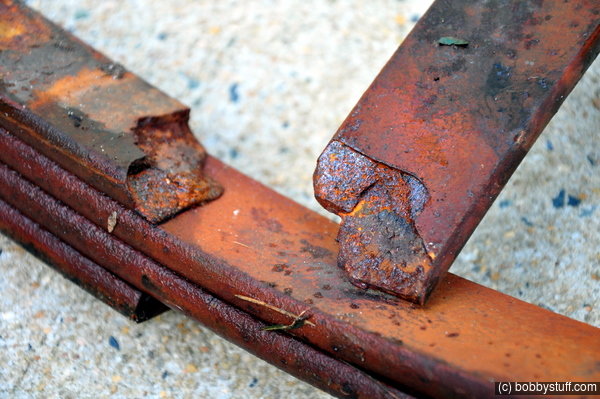
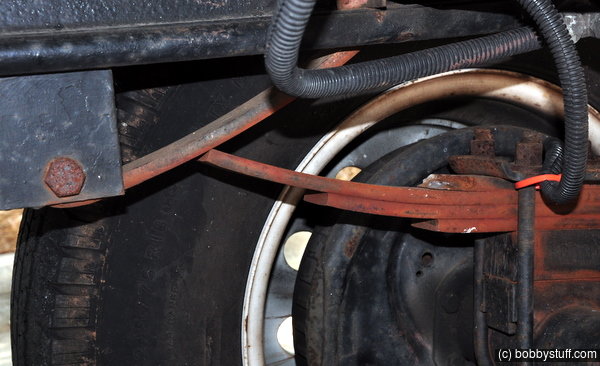
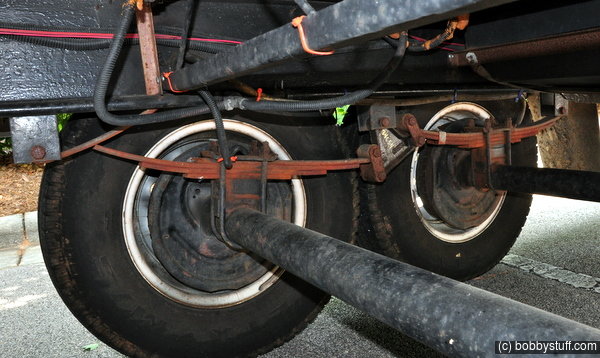
So in mid June 2009 I took the Wildcat to my place of work on a Friday before going to the Smoky Mountains. I parked and did a walk around and noticed the two tires on the curb side were very close together. It did not take long to determine that one of my springs had broken.
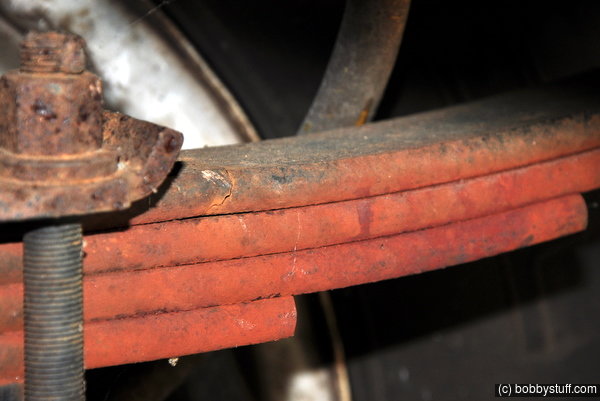
While checking the others I found another that was cracked. I am positive the spring broke about 1 mile from my workplace while crossing a very rough bridge. At this point I could not even take the Wildcat home. I was stuck and planning to take a 300 mile trip the next day.
I started calling around and everyone told me to call a business in a local small town. This fellow understood exactly what I was talking about and after giving him my measurements of the springs, he told me he had what I needed. Also his springs would have a higher weight rating than the ones I had. They had an extra leaf. I am not sure that the springs under the Wildcat were strong enough.
I had replaced the existing u-bolts when I added spacer blocks years ago. The bolts were too long and my Dad and I had just hacked them off with a cutting torch. I knew I could not reuse them so I had to get new u-bolts made also.
I obtained all the parts during a very long lunch break and gathered the tools I would need from the house. Those included an air/hydraulic jack, wood blocks, jack stands, impact wrenches, pancake air compressor, angle grinder, Sawz-All and a window fan to blow air on me on a very hot summer .
That evening after work, I fired up my Honda EU3000 generator to run the air compressor, tools and window fan and started work. I replaced the two broken springs in about 3 hours and got the Wildcat home. The next morning I replaced the other two springs in about 2 hours and left on my trip about noon instead of about 7:00am as originally planned. The new springs were a different thickness and I also did not trust the two unbroken springs so I just replaced all four.
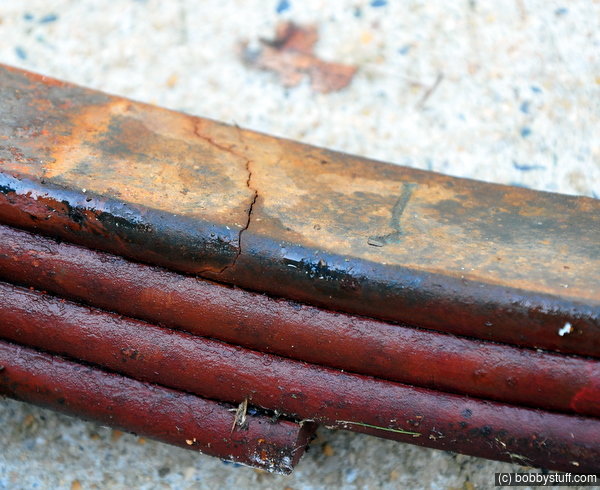
It was obvious the broken spring had been cracked for some time. Most of the broken area was rusty with about 1/4 of the area showing fresh metal.
I have about 60,000 miles on the Wildcat. I am on my third set of spring shackles but never dreamed I would one day have broken springs also. So if you put many miles on your Wildcat you should add checking the springs and shackles to your inspection list before every trip. On a later RV, during a disc brake conversion, I upgraded the springs at the same time.
| Worn Spring Shackles Again |
Topics
TagsElectrical (18),Generator (7),Leaks (3),Lights (3),Springs and shackles (7),Tires (3)